 Save to Pinterest
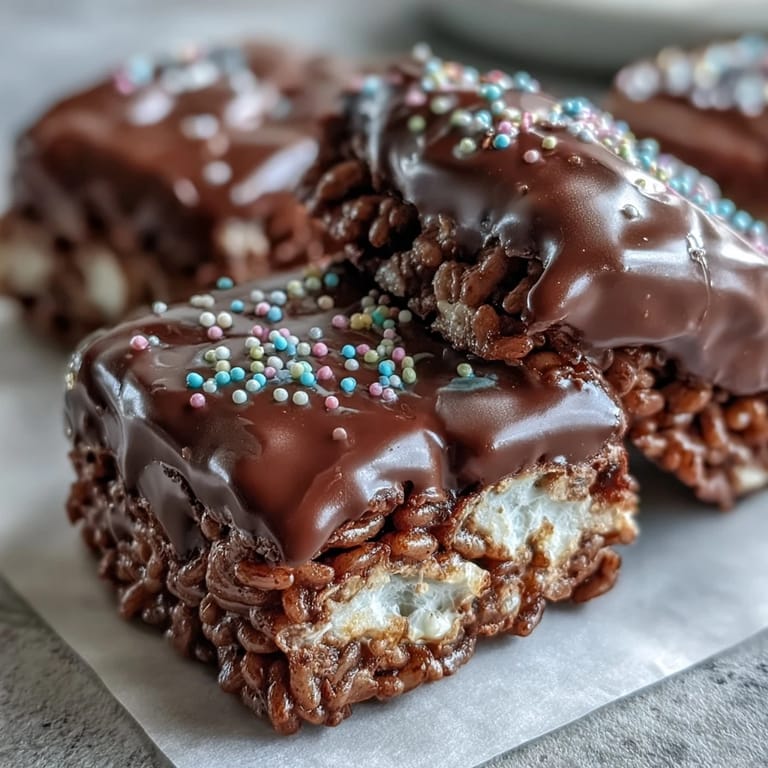
 My nephew's eighth birthday party was chaotic—kids running everywhere, punch spilled on the rug—but the moment I set these chocolate-covered treats on the table, silence swept the room. I'd almost skipped the chocolate layer to save time, but something told me to go all in. Watching a dozen sticky hands reach for them at once, I knew I'd made the right call. They disappeared in minutes, and I spent the rest of the afternoon fielding requests for the recipe from parents who'd only managed to grab one.
I started making these the week before every family gathering because they're one of the few desserts my picky cousin and my health-conscious aunt both enjoy. There's something about the nostalgic cereal base that makes people let their guard down. Once, I brought a double batch to a potluck and watched a retired teacher sneak three squares into her purse when she thought no one was looking. I pretended not to notice, but it made my whole week.
Ingredients
- Unsalted butter: Use unsalted so you control the saltiness, and always grease your hands or spatula with extra butter to prevent sticking when you press the mixture into the pan.
- Mini marshmallows: The minis melt faster and more evenly than large marshmallows, giving you a smoother, creamier bind without scorching.
- Rice Krispies cereal: The classic crunch, avoid generic brands if you want that signature snap, and measure lightly without packing the cup.
- Fine sea salt: Just a pinch balances the sweetness and makes the chocolate topping taste richer and more complex.
- Semisweet or dark chocolate chips: Semisweet is crowd-pleasing, dark adds sophistication, either way the oil helps the chocolate spread like silk.
- Vegetable oil or coconut oil: A teaspoon thins the chocolate just enough to pour and set with a glossy, professional finish instead of a dull, thick coat.
- Rainbow sprinkles or chopped nuts: Sprinkles bring joy and color, nuts add grown-up texture, both need to go on while the chocolate is still tacky.
Tired of Takeout? 🥡
Get 10 meals you can make faster than delivery arrives. Seriously.
One email. No spam. Unsubscribe anytime.
Instructions
- Prep Your Pan:
- Grease your pan generously with butter, or line it with parchment paper for easier lifting later. Don't skip this step or you'll be chiseling out stuck corners with a butter knife.
- Melt the Butter:
- Keep the heat low and stir constantly so the butter doesn't brown or separate. The moment it's fully liquid, you're ready for the marshmallows.
- Melt the Marshmallows:
- Add the marshmallows and stir gently but persistently until they collapse into a glossy, stretchy cream. If you see any lumps, keep stirring, they'll smooth out.
- Season and Mix:
- Pull the pan off the heat, stir in the salt if using, then fold in the cereal with a light hand so you don't crush it. Work quickly before the marshmallow cools and stiffens.
- Press Into Pan:
- Transfer the warm mixture to your pan and press it down firmly and evenly with buttered hands or a spatula. The more evenly you press, the cleaner your cuts will be later.
- Cool the Base:
- Let the cereal layer rest at room temperature for about ten minutes so it firms up just enough to support the chocolate without sinking.
- Melt the Chocolate:
- Combine chocolate chips and oil in a microwave-safe bowl, then heat in thirty-second bursts, stirring after each until the mixture is smooth and pourable. Don't rush this or you'll end up with seized, grainy chocolate.
- Pour and Spread:
- Pour the melted chocolate over the cooled base and spread it evenly with an offset spatula or the back of a spoon. Work confidently but gently so you don't drag up cereal bits.
- Add Garnish:
- Scatter your sprinkles or nuts immediately while the chocolate is still wet and tacky. Once it sets, toppings won't stick.
- Let It Set:
- Leave the pan at room temperature for at least an hour, or pop it in the fridge for twenty to thirty minutes if you're in a hurry. The chocolate should be firm to the touch before you cut.
- Cut Into Bars:
- Lift the whole block out using parchment overhang if you lined the pan, or invert it onto a cutting board. Use a sharp knife, wiping it clean between cuts for neat edges.
 Save to Pinterest
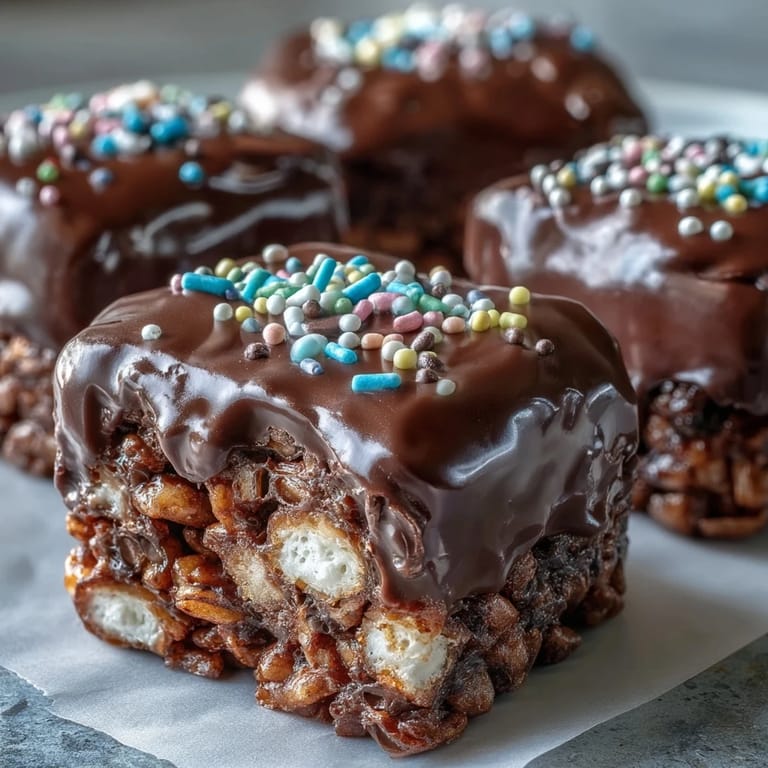
 The first time I made these for a bake sale, I worried they were too simple compared to the elaborate cupcakes and layered cakes around them. But they sold out in the first twenty minutes, and two moms asked if I'd consider making them for their kids' birthdays. That's when I realized that sometimes the best recipes aren't the fanciest ones, they're the ones that make people smile before they even take a bite.
Storage and Freshness
These bars keep beautifully in an airtight container at room temperature for up to three days, though I've never had a batch last that long. If your kitchen runs warm or you live somewhere humid, the fridge is your friend, they'll stay firm and fresh for a full week. Just let them sit out for five minutes before serving so the chocolate isn't too hard to bite through. I've also frozen them successfully for up to a month, layered between parchment sheets in a freezer-safe container, and they thaw in about fifteen minutes on the counter.
Flavor Variations
Once you've nailed the classic version, the world opens up. I've stirred a half teaspoon of vanilla extract into the melted marshmallows for a warmer, more aromatic base, and I've swapped semisweet chocolate for white chocolate and topped it with pastel sprinkles for baby showers. A friend of mine adds a tablespoon of peanut butter to the marshmallow mixture and uses milk chocolate on top, and her kids lose their minds every time. You can also press mini M&Ms or crushed pretzels into the chocolate layer for extra texture and color.
Serving Suggestions
These treats shine at room temperature, but I've served them chilled at summer barbecues and they held up perfectly in the heat. They're wonderful on a dessert platter alongside brownies and cookies, or wrapped individually in cellophane with a ribbon for party favors. I like cutting them into small squares for cocktail parties and larger bars for lunchboxes.
- Pair them with cold milk or hot coffee for a nostalgic snack break.
- Stack them in a clear jar as an edible centerpiece that doubles as dessert.
- Drizzle extra melted chocolate over the top in zigzag patterns for a fancier presentation.
 Save to Pinterest
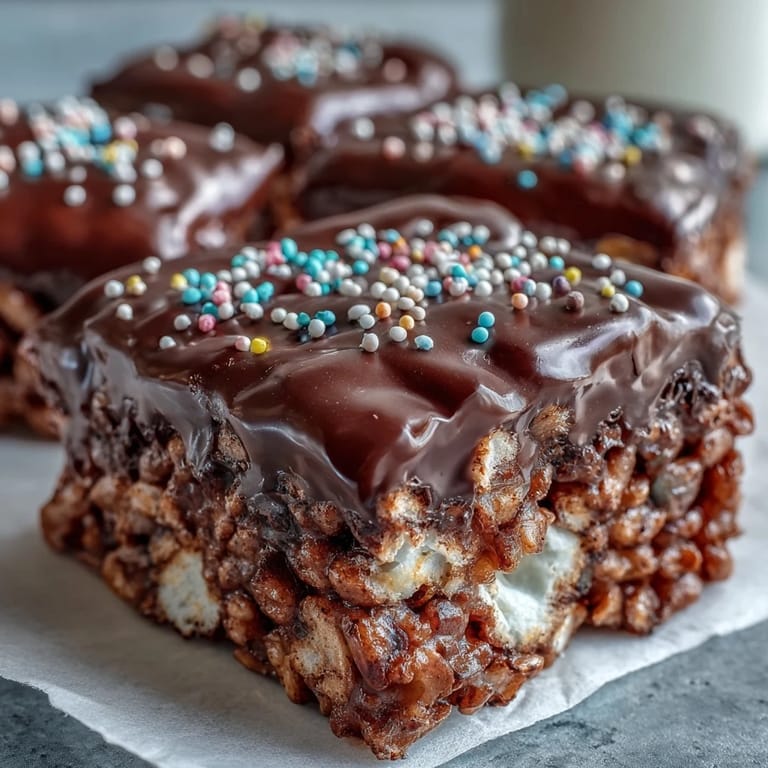
 There's a reason these treats have stuck around for generations, they're proof that simple ingredients and a little care can create something people remember long after the last crumb is gone. Make a batch this weekend and watch how quickly they vanish.
Recipe Questions & Answers
- → How long do chocolate covered Rice Krispy treats stay fresh?
Store these treats in an airtight container at room temperature for up to 3 days. For longer storage, keep them in the refrigerator for up to a week. The chocolate may develop a slight bloom from temperature changes, but this won't affect the taste.
- → Can I use white chocolate instead of semisweet?
Absolutely! White chocolate works beautifully and creates a lovely contrast with the colorful sprinkles. You can also mix white and dark chocolate for a marbled effect, or use milk chocolate for a sweeter finish.
- → Why did my marshmallows turn hard when melting?
This usually happens from overheating. Always melt marshmallows over low heat and stir constantly. If they become stiff or grainy, you've cooked them too long. Remove them from the heat as soon as they're completely smooth and glossy.
- → Should I refrigerate these to set the chocolate faster?
Yes, refrigerating for 20-30 minutes will firm the chocolate quickly. However, for the best texture, let them set at room temperature for at least 1 hour if possible. Cold Rice Krispy treats can lose some of their classic softness.
- → Can I freeze these treats for later?
Yes! Wrap individual bars tightly in plastic wrap and place in a freezer-safe container. They'll keep for up to 6 weeks. Thaw at room temperature for about an hour before serving. The chocolate may sweat slightly as it thaws but will regain its gloss.
- → What's the best way to cut clean squares?
Let the chocolate set completely before cutting. Use a sharp knife that you've run under hot water and wiped dry. Press down firmly rather than sawing back and forth. For extra clean cuts, you can briefly warm the knife blade with a kitchen torch.