 Save to Pinterest
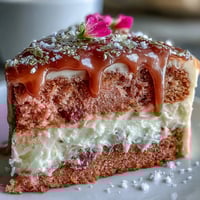
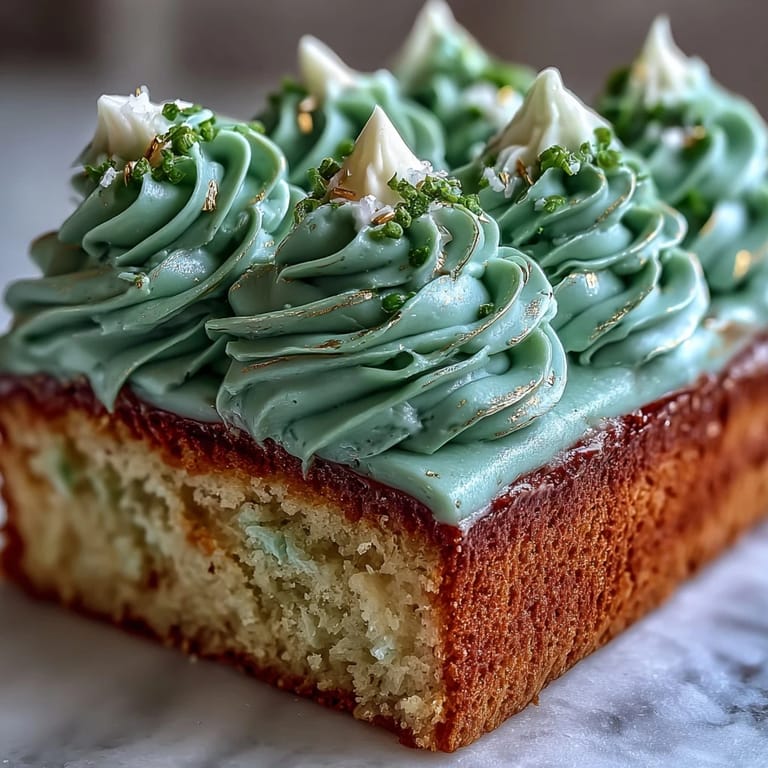
 Some recipes have a way of transforming even ordinary days into a celebration, but when I first tried my hand at a graduation sheet cake, the kitchen felt electric with promise. There was a quiet excitement as I mixed the batter, my mind skipping ahead to the sage green and gleaming gold buttercream that would top it. I could almost hear the distant pop of confetti as the vanilla scent drifted through the house. This cake, with its fresh palette and soft crumb, is my secret for making any milestone feel as special as it truly is. Decorating it turned out to be much more fun (and less intimidating) than I ever imagined—even for my not-so-steady hands.
I remember the day I baked this for my little cousin's graduation, a hot June afternoon. My niece kept sneaking into the kitchen to swipe tiny streaks of buttercream from the mixing bowl, leaving telltale green marks on her cheeks. Laughter bounced off every countertop as the decorations began to take shape, and someone inevitably piped a not-so-perfect diploma on one corner. Every time I smooth on that buttery sage green layer, it brings me back to that chaotic, happy parade of hands, music, and anticipation.
Ingredients
- All-purpose flour: Sift it well to keep the crumb fluffy; I've learned clumps can mean dense cake.
- Baking powder: Gives the cake lift—always check the expiration before baking big celebratory cakes!
- Salt: Just a pinch brings flavors alive; don't skip it.
- Unsalted butter: Room temperature butter creams smooth and adds richness; set it out in advance for effortless mixing.
- Granulated sugar: Sweetens and helps the cake brown to a gentle gold; use the full amount for the best flavor.
- Large eggs: Crack them one by one into a separate bowl to avoid shell mishaps—I've learned this from messy experience.
- Pure vanilla extract: Quality makes a difference here; the aroma alone lifts the mood.
- Whole milk: Room temperature helps batter blend evenly, giving a uniformly tender cake.
- Powdered sugar: Always sift unless you want surprise lumps in your buttercream.
- Heavy cream or milk: A tablespoon at a time gives you perfectly spreadable frosting without it running off.
- Sage green gel food coloring: Start with a little and work up for the calm, earthy shade; gels keep the buttercream's texture silky.
- Gold edible luster dust: Mix with clear vanilla for the shiniest finish—a little goes a long way for that striking accent.
- Clear vanilla extract or vodka: Just a teaspoon helps the gold paint glide on; I find it makes detailing truly foolproof.
Tired of Takeout? 🥡
Get 10 meals you can make faster than delivery arrives. Seriously.
One email. No spam. Unsubscribe anytime.
Instructions
- Line and preheat:
- Set your oven to 350°F and slide on some music; greasing and lining the big sheet pan is the first step to an easy release.
- Mix dry ingredients:
- Combine flour, baking powder, and salt in a bowl and give it a thorough whisk; you'll see a soft cloud and know it's ready.
- Cream butter and sugar:
- Beat butter and sugar together until the mixture is light in color and fluffy, and you can see tracks from the mixer paddles.
- Add eggs and vanilla:
- Drop eggs in one at a time, letting them disappear before adding the next—let the rich scent of vanilla follow after.
- Alternate flour and milk:
- With one hand on the bowl, add the flour mixture in thirds, gently mixing while pouring in the milk between; the batter will end velvety and pale.
- Bake the cake:
- Spoon into the pan, smoothing the top; listen for a faint sizzle as it goes in the oven and bake until the surface is golden and springs back.
- Cool completely:
- Let the cake cool in the pan on a rack; this keeps it steady and prevents cracks, even if you're impatient like me.
- Make the buttercream:
- Beat room-temp butter until creamy, then slowly add in powdered sugar, vanilla, salt, and cream, mixing for a frosting that's soft but holds a peak.
- Tint sage green:
- Add gel food coloring a bit at a time, stirring until you get that fresh, leafy hue—reserve a half cup of frosting for the gold step.
- Frost the cake:
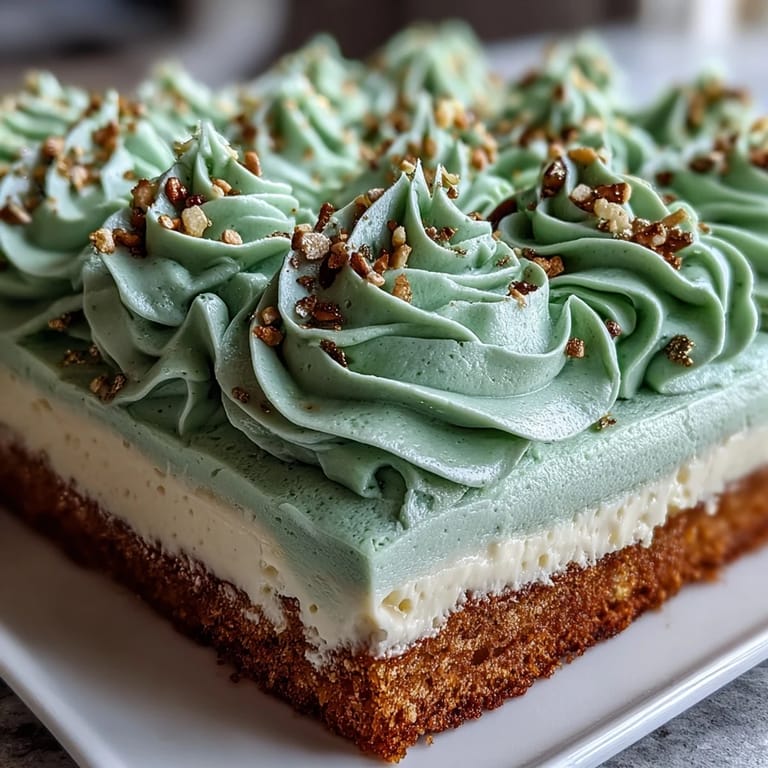
- Spread the sage green buttercream over the cooled cake in swoops and swirls, feeling for an even, generous layer.
- Create gold accents:
- Mix a little gold luster dust with clear vanilla or vodka, then use a small brush to add shimmer to piped details or stripes wherever feels festive.
- Decorate and serve:
- Scatter with gold sprinkles, pipe graduation caps, or add playful notes in the margins before chilling for crisp slices.
 Save to Pinterest
  Save to Pinterest
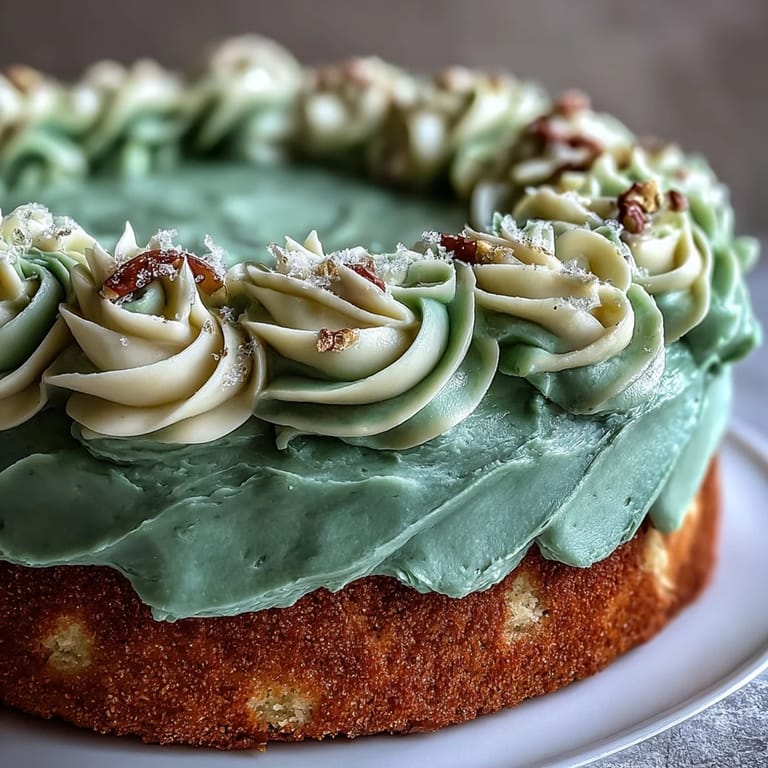
 When we brought the finished cake to the party, I watched one of the grads linger by the dessert table, fingers tracing the neat swirls and golden touches with awe. It struck me in that moment that sometimes a little extra effort—or a bold splash of edible gold—can make someone feel genuinely celebrated. Seeing that look of utter delight made the flour-splattered apron and extra dishwashing more than worth it.
Customizing for Every Celebration
I've tried adding a bit of lemon zest to the cake batter or a hint of almond extract, and both variations disappear just as fast at gatherings. If you're baking for a gluten-free crowd, a quality 1:1 all-purpose gluten-free blend works in a pinch, though the texture is slightly more delicate. Buttercream colors are your playground—soft blue, blush, or lavender work beautifully for different themes and seasons.
Mastering the Buttercream Finish
Dealing with a Texas summer, I've fought more than one battle with melting buttercream. Chilling the cake briefly before decorating, and again before slicing, keeps your colors vivid and piped designs crisp. If your buttercream seems too thick, a few extra drops of cream make it easier to get that perfectly velvety, swooping finish.
Serving, Storing, and Troubleshooting
After many rounds of celebrating (and snacking), I've found this cake slices best when it's cold out of the fridge—just run a knife under hot water for clean edges. For leftovers, press a piece of wax paper gently onto the frosting before covering to keep colors bright and surfaces smooth. If decorations start to smudge, a dab more buttercream and a steady hand can fix almost anything.
- If your gold accent turns streaky, reload your brush and keep strokes gentle.
- Refresh buttercream with a quick whip before piping details.
- Never skip chilling before you cut; it makes neat squares and happy guests.
 Save to Pinterest
  Save to Pinterest
 Here’s to every milestone, big or small, and to the joy of sharing a cake that looks as radiant as the memories it celebrates. May each slice bring a little extra sparkle to your table.
Recipe Questions & Answers
- → How do I ensure an even bake in a sheet pan?
Use an even layer of batter and line the pan with parchment so the cake rises uniformly. Rotate the pan halfway through baking if your oven has hot spots, and test with a toothpick near the center for doneness.
- → What's the best way to get silky buttercream?
Beat room-temperature butter until pale and fluffy, then add sifted powdered sugar gradually. Add heavy cream a tablespoon at a time until the texture is smooth and spreadable; strain powdered sugar if you notice lumps.
- → How much color will gel food coloring add without thinning?
Gel color concentrates pigment without adding liquid, so start with a small amount and build to the desired sage tone. Knead or beat the buttercream thoroughly to distribute color evenly.
- → How do I make durable gold accents?
Mix edible luster dust with a drop or two of clear vanilla extract or vodka to form a paint, then brush onto a reserved portion of buttercream or piped details. Alternatively, fold dust into buttercream for a marbled sheen.
- → Can I prepare this ahead of time?
Yes. Bake and cool the sheet, wrap tightly and refrigerate for up to 2 days, or freeze layers for longer storage. Frosted cake can be chilled to set the buttercream; bring to room temperature before serving.
- → What are easy substitutions for dietary needs?
Use gluten-free 1:1 flour for a gluten-free version (expect a textural change). Swap dairy butter with a suitable plant-based stick for a dairy-free approach, and use label-checked powdered sugar if needed.