 Save to Pinterest
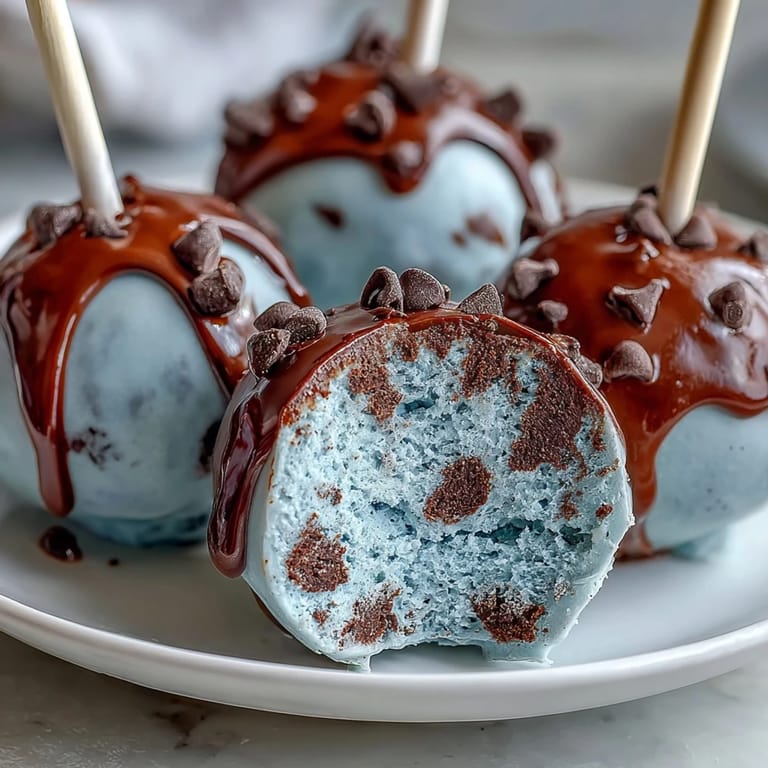
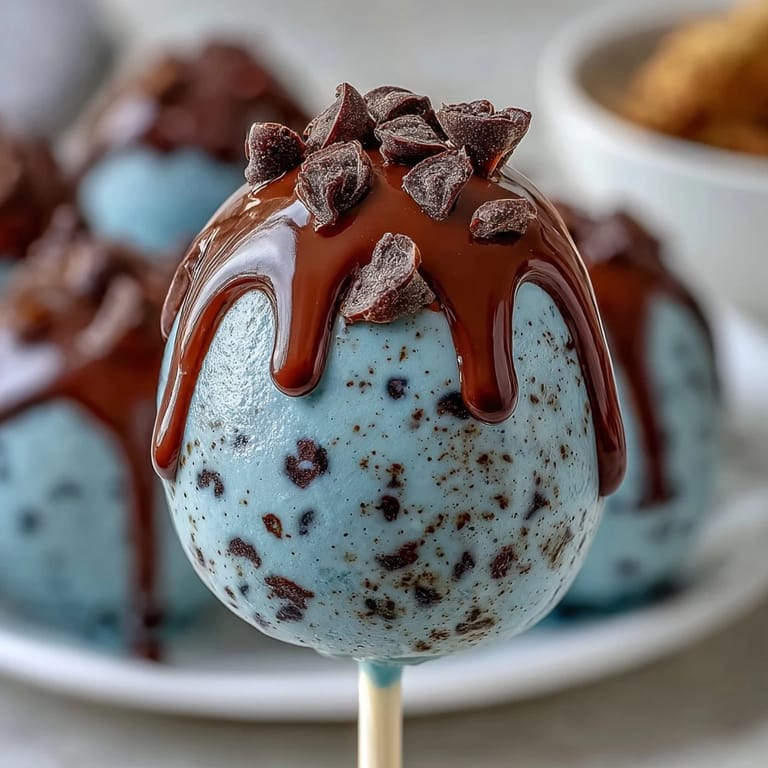
 My sister texted me a photo of robin eggs she'd found in her garden, and I couldn't stop staring at that impossible blue. Three days later, I was standing in my kitchen with melted white chocolate and a tiny bottle of gel food coloring, trying to capture that exact shade for her Easter brunch. The first batch came out too pale, the second too dark and turquoise, but on the third attempt, something clicked—and suddenly I had these perfect little spheres that looked like they'd rolled straight out of a nest.
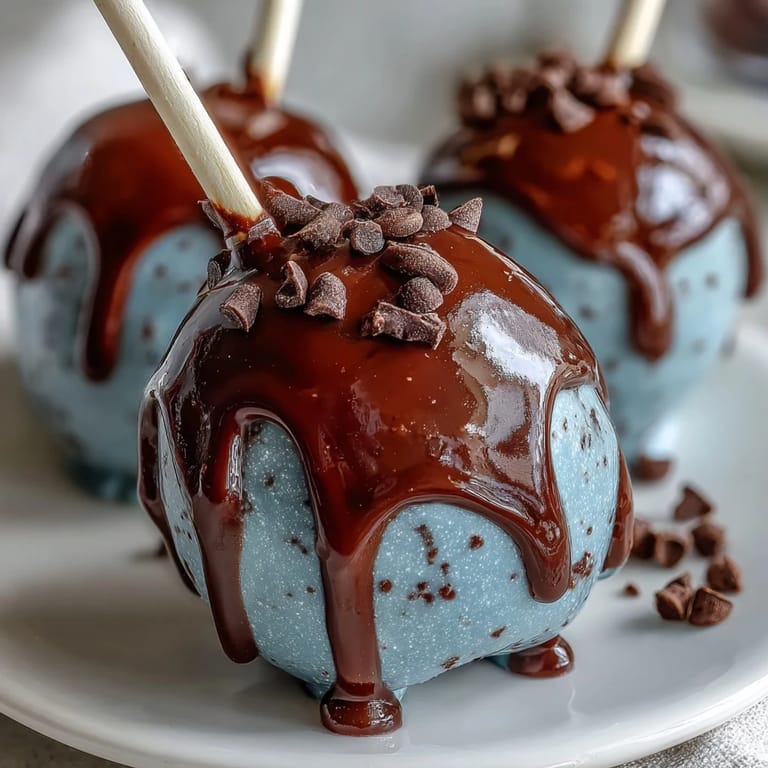
I brought a box of these to a spring potluck where everyone was bringing the same tired store-bought desserts, and watching people's faces when they bit into the soft cake center was absolutely worth the two hours I'd spent dipping and sprinkling. One guest kept asking how I made them taste so moist inside, and honestly, it's because that frosting-to-cake ratio is pure magic—not too much, not too little, just enough to keep everything tender.
Ingredients
- Vanilla cake mix: A reliable shortcut that gives you a clean, neutral base so the delicate blue coating and cocoa specks become the real stars.
- Unsalted butter and powdered sugar: Creaming these together creates that silky frosting that binds the crumbs without making everything greasy or heavy.
- White candy melts or white chocolate: Candy melts melt smoother and set faster, but real white chocolate gives a slightly richer taste—choose whichever feels right for your crowd.
- Oil-based blue gel coloring: This is the non-negotiable difference between a smooth robin egg blue and a chocolate that seizes up and turns grainy, trust me on this one.
- Coconut oil or vegetable shortening: A tablespoon or two thins the coating to a perfect dipping consistency without dulling the color or flavor.
- Cocoa powder and vodka: The vodka evaporates instantly and leaves behind those gorgeous speckles that make each pop look handcrafted and intentional.
Tired of Takeout? 🥡
Get 10 meals you can make faster than delivery arrives. Seriously.
One email. No spam. Unsubscribe anytime.
Instructions
- Bake and cool your cake:
- Follow the box instructions exactly, and don't skip letting it cool completely on a wire rack—a warm cake will make your frosting melt and your finished pops will be soft and shapeless. Once it's at room temperature, you're ready to transform it.
- Make the frosting:
- Cream the butter until it's pale and fluffy, about two minutes with an electric mixer, then gradually add the powdered sugar so it doesn't cloud your kitchen with a sweet white dust. The milk and vanilla come last, making everything smooth and spreadable.
- Mix cake and frosting into dough:
- Crumble that cool cake into fine pieces with your hands—it should look like damp sand, not chunky—then add frosting bit by bit while mixing with your fingertips until it just barely holds together. You're aiming for dough consistency, not a sticky mess.
- Roll and freeze your balls:
- Roll each portion to roughly the same size (a heaping tablespoon works perfectly) and nestle them on parchment paper, then slide them into the freezer for fifteen minutes so they stay firm when you dip them. This step is worth the patience.
- Melt and tint your coating:
- Use a double boiler or microwave in short twenty-second bursts, stirring between each interval to avoid overheating, then add your blue gel coloring drop by drop until you hit that robin egg magic. If it's too thick, thin it with a touch of coconut oil and stir gently.
- Stick your pops:
- Dip the tip of each lollipop stick in the blue coating like you're sealing it with glue, then push it into the center of each frozen cake ball and refrigerate for ten minutes to lock everything in place. This prevents the stick from spinning loose when you dip.
- Dip into the blue:
- Hold each pop by the stick and submerge it completely into the warm coating, letting the excess drip away for a few seconds, then plant it upright in your Styrofoam stand to set. Work quickly so the coating doesn't cool too much between dips.
- Add the speckled effect:
- Mix cocoa powder with just enough vodka to make a thin, brushable paste, dip a clean brush in, and flick it gently across the blue surface to create delicate specks that look like bird feathers. Don't oversaturate—restraint makes it look more professional.
- Let everything set:
- Give the pops at least an hour at room temperature or a few hours in the refrigerator before serving, so the coating hardens completely and you get that satisfying snap when someone bites through.
 Save to Pinterest
 There's something quietly special about food that looks like it came from nature—those robin eggs sitting on a dessert table felt like we'd brought spring indoors. People lingered over them longer than they normally would with store-bought treats, asking questions and taking photos, which is when I realized these aren't just cake pops, they're a conversation starter.
The Secret Behind That Perfect Robin Egg Shade
The first time I tried making robin egg blue, I kept adding more coloring because I was convinced the pale version wasn't right, but pale blue is actually the secret—it's delicate and realistic, not neon or artificial. Start with just a few drops and build up slowly, tasting a tiny speck on your tongue between additions so you develop a feel for how the color deepens as the white melts. Once you've made one batch that you love, write down exactly how many drops you used, because robin egg blue is surprisingly hard to replicate if you're flying blind.
Timing and Storage Strategy
These are actually best made a day or two ahead because the flavors meld together beautifully overnight, and the coating stays crisp longer if it's had time to fully set in a cool environment. I usually make mine on a Friday evening, store them in an airtight container at room temperature, and they're perfect for a Saturday gathering. If you're in a warm climate or making them for an outdoor event, refrigerate them right up until serving time.
Flavor Variations That Actually Work
The vanilla frosting is a blank canvas, so feel free to experiment—I've made batches with almond extract that tasted almost marzipan-like, and others with a hint of lemon zest that added brightness without overpowering the delicate cake. The beauty is that whatever flavor you choose stays hidden until someone bites through, making it feel like a little surprise inside each pop. Try one or two pops with a different extract before committing to a whole batch, because personal preference matters more than following rules.
- Almond extract creates a subtle marzipan undertone that pairs beautifully with the cocoa specks.
- Lemon zest adds freshness without making the frosting runny—use a microplane and zest directly into the mixer.
- A tiny pinch of salt in the frosting makes everything taste more intentional and balanced.
 Save to Pinterest
 These little robin eggs have become my signature Easter offering, the thing people actually ask me to bring. There's real joy in watching something small and simple turn into something that feels fancy and memorable.
Recipe Questions & Answers
- → What creates the robins egg blue color?
The color comes from blue gel food coloring mixed into white candy melts or white chocolate, providing a vibrant, smooth coating.
- → How is the speckled effect achieved?
A mixture of cocoa powder and vodka or clear extract is brushed gently over the coated cake balls to create delicate speckles.
- → Can the frosting be flavored differently?
Yes, adding lemon or almond extract to the frosting provides a pleasant flavor twist.
- → How do you ensure the coating sets properly?
After dipping, the cake pops should be allowed to stand upright to fully set, preferably refrigerated for 10 minutes to secure the sticks.
- → What alternatives exist for dietary restrictions?
Use gluten-free cake mix and verify all ingredients are gluten-free to accommodate dietary needs.
- → How long do these treats keep fresh?
Store at room temperature for up to 3 days or refrigerate for up to a week to maintain freshness.