 Save to Pinterest
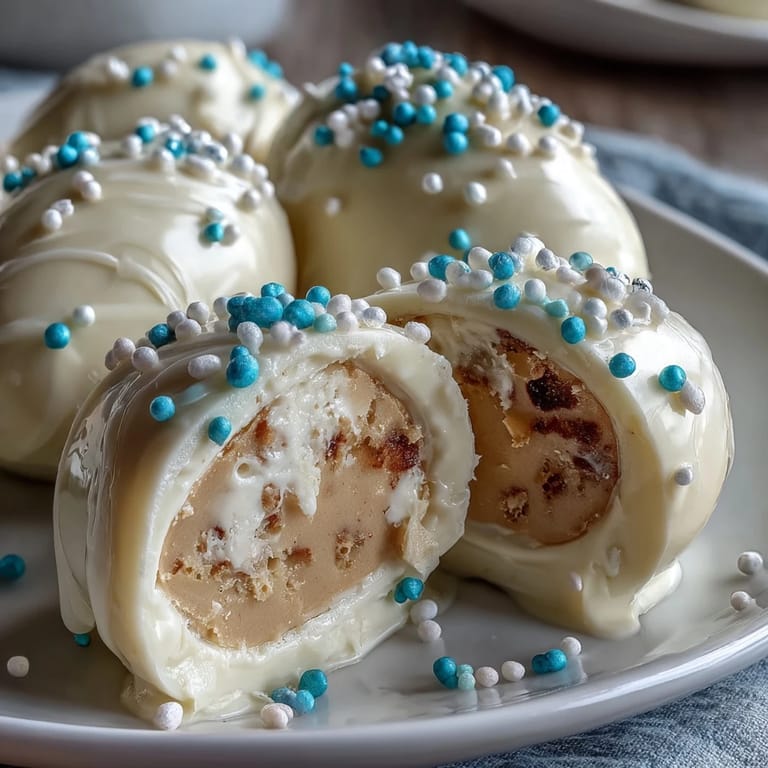
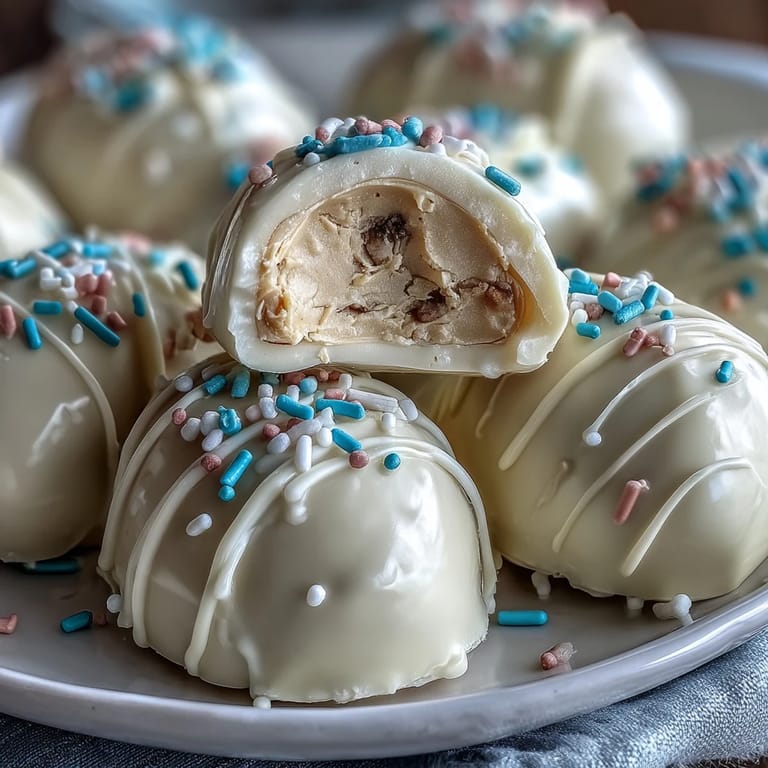
 The first time I made these White Chocolate Peanut Butter Easter Eggs, I was drawn in by the cheerful sprinkles and the promise of a creamy center. The kitchen was filled with the aroma of melted white chocolate, and my curiosity peaked as I dipped each homemade egg, hoping the coating would turn out smooth. I always love when treats come together quickly, especially ones with a playful theme. There was an undeniable sense of anticipation as I lined up the eggs, wondering which color sprinkle would end up on top. These festive sweets instantly added a pop of fun to my counter, like little edible Easter decorations.
Last spring, I made a batch of these for my neighbor's family after a spontaneous invite. We ended up coloring eggs and laughing over slightly misshapen peanut butter shapes—no one cared, especially when the white chocolate pooled just right and the sprinkles made every egg unique. Sharing brought out the best flavor and made an ordinary afternoon feel like a celebration.
Ingredients
- Creamy peanut butter: The base for the filling, and I prefer stirring the jar well beforehand to avoid dry spots.
- Unsalted butter: Softened butter blends more easily, so I leave it out while prepping other ingredients.
- Powdered sugar: Sifts smoothly into the filling and gives just the right sweetness and texture.
- Vanilla extract: Adds warmth and rounds out the flavors with a gentle aroma.
- Salt: Balances the sweetness—just a pinch is enough to shine.
- White chocolate chips or melting wafers: Melts best in short bursts in the microwave; I always taste test for quality.
- Coconut oil: Makes the chocolate silky, so don't skip it if you want an extra glossy finish.
- Colorful sprinkles: Pick a variety to create contrast; pastel ones give the classic Easter look.
Tired of Takeout? 🥡
Get 10 meals you can make faster than delivery arrives. Seriously.
One email. No spam. Unsubscribe anytime.
Instructions
- Mix the filling:
- Start by beating peanut butter, butter, vanilla, and salt together until creamy—watch for that mousse-like texture to develop.
- Add powdered sugar:
- Pour it in gradually, and soon the dough gets thick and easy to shape; use a spatula to scrape every last bit from the bowl.
- Shape the eggs:
- Scoop out some mixture and roll it between your hands, smoothing any cracks if they form; it's okay if they look rustic.
- Chill:
- Pop the tray in the fridge for half an hour, and resist sneaking one—the colder they get, the easier to coat.
- Melt the chocolate:
- Microwave in 30-second bursts, stirring after each, until glossy and fluid without graininess.
- Dip and decorate:
- Use a fork or dipping tool to coat each chilled egg, then gently shower sprinkles over the top before the chocolate starts to set.
- Set the chocolate:
- Return eggs to the fridge for a quick chill; when you pick one up, the coating shouldn't stick to your fingers.
- Storage:
- Transfer to an airtight container and keep refrigerated; they stay perfectly fresh and ready for sharing or gifting.
 Save to Pinterest
 One Easter morning, I tucked these eggs into little baskets for my nieces. When they discovered them, squeals rang through the house and sprinkles flew everywhere—it was a moment that reminded me treats can deliver joy far beyond flavor.
Making It Special for Spring Celebrations
Decorating these eggs together is a great way to welcome spring. Sometimes, we get a little competitive with sprinkle patterns, and it's pure fun seeing who can come up with the brightest designs. It's the kind of recipe that invites creativity and laughter. The eggs double as colorful centerpieces before disappearing as snacks. Even when the weather is unpredictable, these treats bring a burst of sunshine indoors.
Best Ways to Store and Gift Them
If you want these eggs to look pristine for gifting, layer them between sheets of parchment in a tin or bakery box. A simple ribbon adds a festive touch. Keeping them cold means the chocolate stays crisp and shiny. For bigger gatherings, I sometimes serve them straight from the fridge on a platter with extra sprinkles scattered for flair. They travel well, so they're perfect for school events or neighborhood swaps.
Troubleshooting the Dipping Process
Getting the chocolate coating just right is partly science and mostly patience; if it starts to thicken, a quick rewarm saves the day. Occasionally, eggs break apart while dipping—press them gently back together without panicking. Sprinkles stick best when added immediately, so keep them nearby. Share your mishaps; they often become someone's favorite.
- If the chocolate gets streaky, stir in a little extra coconut oil.
- Use a fork for dipping—it works better than a spoon.
- Let the eggs cool completely before packing to avoid condensation.
 Save to Pinterest
 Whether for Easter baskets or spontaneous sweets, these eggs turn simple ingredients into happiness. Enjoy the process and save a few for yourself before sharing—they disappear fast!
Recipe Questions & Answers
- → How do I shape the peanut butter mixture into eggs?
Form tablespoon-sized portions of the mixture and mold each into an oval or egg shape by hand before chilling.
- → Can I use a different chocolate for coating?
Yes, dark or milk chocolate can be substituted for white chocolate based on your preference.
- → What kind of sprinkles are best for decoration?
Festive pastel sprinkles add a classic Easter touch, but any colorful assortment works well.
- → How long should the eggs be chilled before dipping?
Chill shaped eggs for 30 minutes to ensure they are firm before coating in chocolate.
- → Are there any allergy concerns with these treats?
They contain peanuts, dairy, and possible soy; always check labels for additional allergens.
- → Can these be made ahead for gifting?
Yes, store in an airtight container and refrigerate until ready to share or gift.